Friday, August 31, 2012

The Rubber Cafe Blog Hop!

The Rubber Cafe Blog Hop
Welcome to The Rubber Cafe new release blog hop. This is Day #5 and you've found your way to my blog!! If you just happened to visit my blog today and would like to start this BLOG HOP from the beginning, simply follow THIS LINK to be taken to The Rubber Cafe blog to begin the celebration. There will be a Grand Prize for one lucky winner plus smaller prizes along the way. . . so be sure to stop at each blog and leave a comment to be registered. Don't forget to also leave a comment on each main blog post at The Rubber Cafe too. We are celebrating the newest release called: on-the-fence-bundle
On the Fence Bundle
This bundle comes with a brand new exclusive die template manufactured by Spellbinders Paper Arts called On the Fence Die! What makes this die unique? It's versatility! At first glance, you might see just a fence but soon you'll realize it can be so much more. Follow us on the blog hop each day from August 27-31 to find out what all this die can do. Let's get started. Here's my project for the day:

 The minute I got the "On The Fence" bundle, I knew I wanted to do something spooky!  There is something about fences that get me thinking of Halloween.  I created this little paper house as a tea light luminary.  I started with the wood texture stamp and embossed it with WOW embossing powder in Black Glint.  I did the same with the windows and shutters.
 The fence was die cut from wood grain embossed cardstock.   This die was so easy and cute! 

 I cut out the windows and added stamped vellum that was ripped to create the look of broken glass.  It was easy with the Rubber Cafe's Scrap Happy Glue! It holds on and doesn't let go!
Here's another view. I  created the top with a piece of the fence die cut and assembled with a slit cut at the top of the roof.
 Here's the center of the window as a single window with shutters pop-dotted.
 Trick of treat anyone?   By the way, the edge of the roof was created with the fence die cut. I just placed the edge over the top of the die and ran it through...
 The doors are actually windows from the "Through A Window" set.  I embossed it with WOW embossing powder in Black Glint over a book page.  Do you see the door knobs? They are Jellie Dots in Black Soot! 

 Here's what the little house looks like lit up... I used a battery-operated tea light (for safety's sake) to create the glow inside!


 I hope you enjoyed my project for the blog hop!  Make sure you leave a comment and head to the Rubber Cafe blog to leave a comment there for a chance to win the prize!

Did I get you in the Fall mood?  Halloween is just around the corner!


Monday, August 27, 2012

Creative Imaginations and Faber-Castell Design Memory Craft blog hop!


Creative Imaginations and Faber-Castell Design Memory Craft designers have teamed up for a fabulous blog hop from August 27-31st!  Hop with us today for craft ideas, inspiration and tutorials!
Don’t forget to leave a comment on each blog for a chance to win!

Creative Imaginations and Faber-Castell Design Memory Craft will each be giving away a $50 prize pack!

The blog hop will end at midnight on August 31st.  The two winners will be announced on the companies’ blogs on September 4th.     

Ready to be inspired?
Okay, here is my project...
 Art Canvas
I created a mixed media altered canvas using many of the products from both companies!!  LOVE these together!
 The canvas was primed with black gesso and then Gelatos were colored over the dry surface and smudged with my fingers. 
White gesso was then applied with an old credit card and scratched into with a sharp tool.
 Using Twinkling H2Os I stamped with Creative Imaginations wood mounted stamp. 
 I colored some Prima letters with Twinkling H2Os after coating them with Primary Elements Bind & Resist first to create a better adherence. 

 After stamping gesso on the canvas with a foam block, I dripped Twinkling H2Os down in the same colors I used on the letters.
 Here's a close up of the painted area using my favorite colors of the Twinkling H2Os...Lemongrass and Mandarine Citrine!
 Thistle stamp using Faber Castell's PITT Big Brush Marker in Black.   I also used the White Big Brush Marker to create circles!


I loved the stencils from Creative Imaginations... the wings and heart were my favorites!  I used Gelatos mixed with water and sprayed for the heart and then outlined it in PITT artist pen with a small tip. The wings were made with modeling paste mixed with Black Licorice Gelato and LuminArte Dragonfly Wing powder.  The result is a black with sparkle that is stunning!

Supplies:
Faber-Castell products:  
Faber Castell Design Memory Craft Gelatos (Black Licorice, Red Cherry, Tangerine, Mango, Bosenberry,  Lemon)
Faber Castell Design Memory Craft PITT Big Brush Marker in Black
Faber Castell Design Memory Craft PITT Artist Pen in S black

Creative Imaginations products: 
28369 Thistle stamp
Stencils
LuminArte Dragonfly Wing
Twinkling H2Os ( Orange Peel, Deep Coral,Rainforest, Mediterranean,Teal Zircon, Mandarine Citrine, Lemongrass,Playful Peony, Meridian, Ginger Flower)
Primary Elements Bind & Resist Powder

I had a blast with this project and hope you liked it!  Don't forget to leave a comment here and on all the other designer's blogs to have a chance to win the prize!

Start hopping!!

START AT:  http://designmemorycraft.typepad.com/design-memory-craft/

Tanisha Long 

Rita Barakat

Shelley Hamilton 

Jill Foster 

Lynne Forsythe

Tiffany Johnson

Alicia Giess

Jen Matott <--------- You are HERE

Donna Bryant

Colleen McGinty

Lynn Kopas

Mou Saha

Jules Eickmeier

END AT: /http://creativeimaginations.typepad.com/

Wednesday, August 22, 2012

Friday Class! Mixed Media Album

 Do want to get your hands on a new Donna Downey Journal  from Prima?  If so, this class is for you!  I am teaching a Mixed Media Album class on Friday, August 24th from 6-8pm at Stampin and Scrappin Time in Bridgeport, NY!  We have spots available and LOTS of product to take home after the class.  There will be left overs and you will finish the covers and a few pages inside with more to add to at home! I'll show you how to use Gelatos to add color, modeling paste for texture, and using new Prima stencils and the Craftsman line products!!!  This is an amazing class!  It's $52 for all the materials and more.  I'll have a doorprize of one of Prima's brand new Hardcover Kraft paper album for one lucky participant! 
You don't want to miss out!  Call the store now to reserve your spot... 1 (315) 633-5325!  It's this Friday at 6pm! 

Here's a peek at some of the modeling paste and Gelatos! 
Also, my Journey Bag class has been rescheduled for September 8th from 2-4pm.   It is all Prima and Faber Castell products and very generous!  The cost is $52 for the class and materials.

Both classes require a basic kit of scissors, paper cutter (although the store has one), pencil, liquid adhesive, and distress tool.   It would be helpful if you can bring a non stick mat and a brush with you as well! 

Don't delay!  These classes are FULL of Prima goodness that is brand new from CHA 2012!

Jen

Sunday, August 12, 2012

Escape

 Summer is in full swing and it's to the point where I am starting to plan for the new school year... YIKES!  We only have about 3 weeks left of summer!  Where did it go?  Well, it's fun to escape the normal everyday schedule and just chillax...
 On those warm evenings where all you have to do is sit and read or think of what needs to be done in the coming week, I like to enjoy an adult beverage.  These are the evenings when the sun stays out longer than the kid's energy lasts.  I put my kids to bed and go out in my back yard to my favorite adirondack chair and enjoy the quiet of the evening.  It's heaven!  My little backyard escape.
 When I taught high school art, the kids would tell me to "Chillax" when I'd get uptight about deadlines or their lack of effort... it would make me laugh to hear them say that!  I  thought it was appropriate to use this made up word when doing this month's layouts.  It was the first word I thought of when I heard we were focusing on "Escape". The pinks and soft colors in this kit make me calm and happy.  I used a piece of chipboard from one of the doors in the kit to act as a frame for my title. Add a bit of doodling and ink drips and it really gives the page my artsy feel. I love that!
 The little banner paper was perfect for this accent and I love the buttons and papers.  I wanted to create a sort of clothesline look here.  Backyard appeal even though I don't have an official clothesline back there, I remember my great grandmother's clothesline and it makes me think back to simpler times.
 My journaling was put on one of those polaroid-type paper pieces and the cloud vellum went behind the photo to give it a light airy feeling.  I can't seem to get away from the banner like edges.

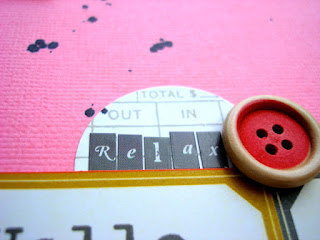
 The words Chill and Relax are on the page to explain what "Chillax" is in reference to.  If I didn't have the kids to explain, I probably wouldn't know this!  LOL!

 Oh my word... those Hambly pieces are divine with the pink peeking through!  LOVE how the contrast each other! 
Even though I'd love to escape to a beach somewhere far away, my backyard is lovely on those quiet, calm summer evenings!  I'll have to look at this page in the dead of winter when I'm missing the warm nights!

Rush right over to Scrapbooking From The Inside Out kits and pick up this gorgeous kit with all it's fun patterns, textures, and embellishments!  Join in with our forum and take a challenge or two!