Okay, I promised a tutorial... here it is! I know it's late in the evening... but it was a crazy day. This is the first chance I've had to actually have peace and quiet.
I'd like to share how to print on metal using Golden Digital Ground for Non-Porous surfaces. Here are the tools you will need:
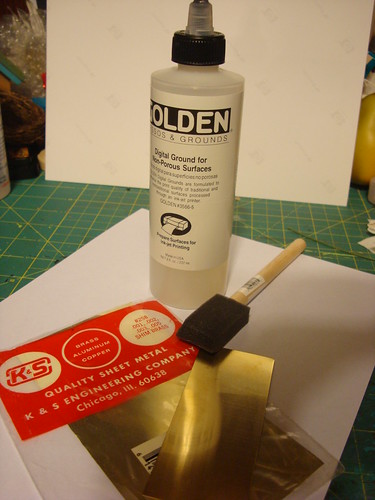
-Golden Digital Ground for Non-Porous Surfaces (good for ink jet printers)
-Thin sheet metal ( I got these at my hardware store) .001 -.005 works in the printer or try aluminum foil!
- foam brush
- inkjet printer
- image with high contrast
Step 1:
Alter an image so that it has HIGH contrast (not too fine of detail). Here is the one I was working with:


Step 2:
Shake up the bottle well... apply an even coat with the foam brush going in one direction onto the metal. You may have to repeat this to get it to coat evenly.. it tends to bead up if there's any oil or residue on the metal.
Let dry... it takes awhile to dry.
Brush on another coat going the other direction. Again, let dry completely (I did this overnight).
Step 3:
Print your photo on plain copy paper. Do NOT click out of the photo program. Attach the metal with the prepared side up. Use removable adhesive (I used removable very thin glue dots).
Step 4: run through printer again. Make sure you know what direction your printer takes the paper. Let the inks dry completely.
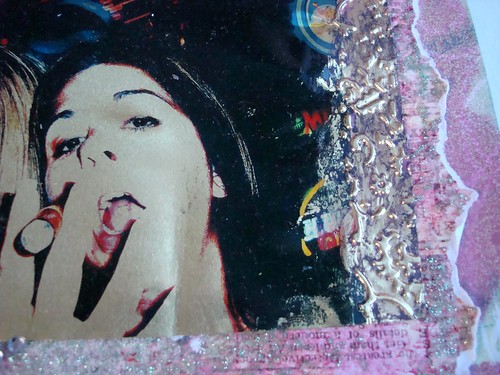
I ran the edges of the metal through my Cuttlebug using the embossing folders. Be careful not to handle the inked edges too much... See my fingerprint there??? Arggh...
Here's the page I used it on:
Here's what it looks like:

It's a very cool effect... I love the shimmery quality of the photo. Very dramatic! Hope you enjoyed this short tutorial.
If you post a comment, I will award one person a RAK (randomly drawn) of some Sassafras Lass goodness. Stamps, papers, buttons... YUM> You have until midnight on March 31st (EST) to post.


