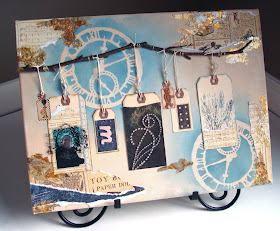
I promised a tutorial each Thursday! This week is another metal technique. I am all about the metal look lately! I love it on paper, cardboard, Grungeboard, altered items, well just about anywhere!!! It's elegant, shiny, and grunge all in one little package. This is what you need:
* Gold Leafing( I get mine at an art supply store, but more and more craft stores are stocking the imitation kind for alot less!)... it comes in gold, variegated red, green, black, or some other combo, and even copper or silver.* Adhesive sizing (this is the glue for the leafing... it has to stay tacky to grab the metal.)
* A disposible brush (one you don't mine ruining!)
* Some people prefer to wear white cotton gloves to do this so the leafing doesn't stick to your hands, but well, I like to make a mess so I don't mind if I transform into "goldfinger".
I made a little tag to show you this demo, but you can certainly venture to gold leafing right on your page or project. I'll show you some examples at the end. Just shake up the sizing and brush it generously on the areas you want the gold to stick. If you are applying it over a textures surface, you will want multiple coats of the sizing. If you want a more uneven application of gold (creates a more distressed look), then apply a bit less.

Step 2: Apply the gold
I tear bits of the leafing at a time and apply it to the sticky (slightly dry the area, don't apply while the sizing is wet... it won't stick) areas.

Step 4: Add on Top
I am then ready to add rub ons, embellishments, anything! Here I added a Hambly rub on to the tag. I may add more, but this is for demo purposes! LOL!

More examples of finished layouts/ projects using gold leafing on the surface.


Now, just leave me a comment below and you could win... a RAK of Prima goodness with a Label Tulip stamp thrown in for good measure! The note set is not a complete set, but only a handful have been used so it's got at least one sheet of each design. There are two kinds of Prima flowers and a brad set. The Label Tulip stamp is one I had and bought a duplicate of just to give away for some lucky girl! So leave some love! I'll pick a winner when I get back from vacation on April 15th. So, you can post a comment until midnight on April 14th! Send your friends here!


i always wanted to try gilding, but it seemed too scarey. you make it look easy and fun.i'm ready to go for it!! thanks. ;) glee
ReplyDeleteWOW! What a cool demo!!! Love it!
ReplyDeletehave an awesome vacay Jen! Love the tut, you know I love sparkly stuff, so I won't be able to resist this for long!
ReplyDeleteAwesome tutorial!
ReplyDeleteWay cool demo....i too have a love affair with metal...thanks for making me look from a different angle!!
ReplyDeletelove you're blog and you are giving away an amazing rak! But most of al I love you're layout, "Broken Record". It's amazing!!! I saw it on Badgirls blog but wanted to tell you here that I just love it!!
ReplyDeleteThank you so much for this tutorial, I love tutorials, there's so much I want to learn and it always looks so complicated, but then when I see a tutorial I think: "hey, I just might be able to do this too!". I've been in love with that "butterflies" LO ever since I saw it at scrapbook.com, it was an instant fav!
ReplyDeletexxx Peggy
Fabby! I just have so much gold leaf and no idea how to bring it into my scrapping... I will try now!
ReplyDeleteP x
Wow I love this blog!
ReplyDeletei just stumbled on to here from the bad girls kit club.
Im glad i found it!
This technique is very neat!
I am defintely going to have to try it out!
great giveaway by the way!
:)
This is SO cool! Love the look.
ReplyDeleteJen, your work is always amazing! So wish I was going on vacay, have a great one!
ReplyDelete